


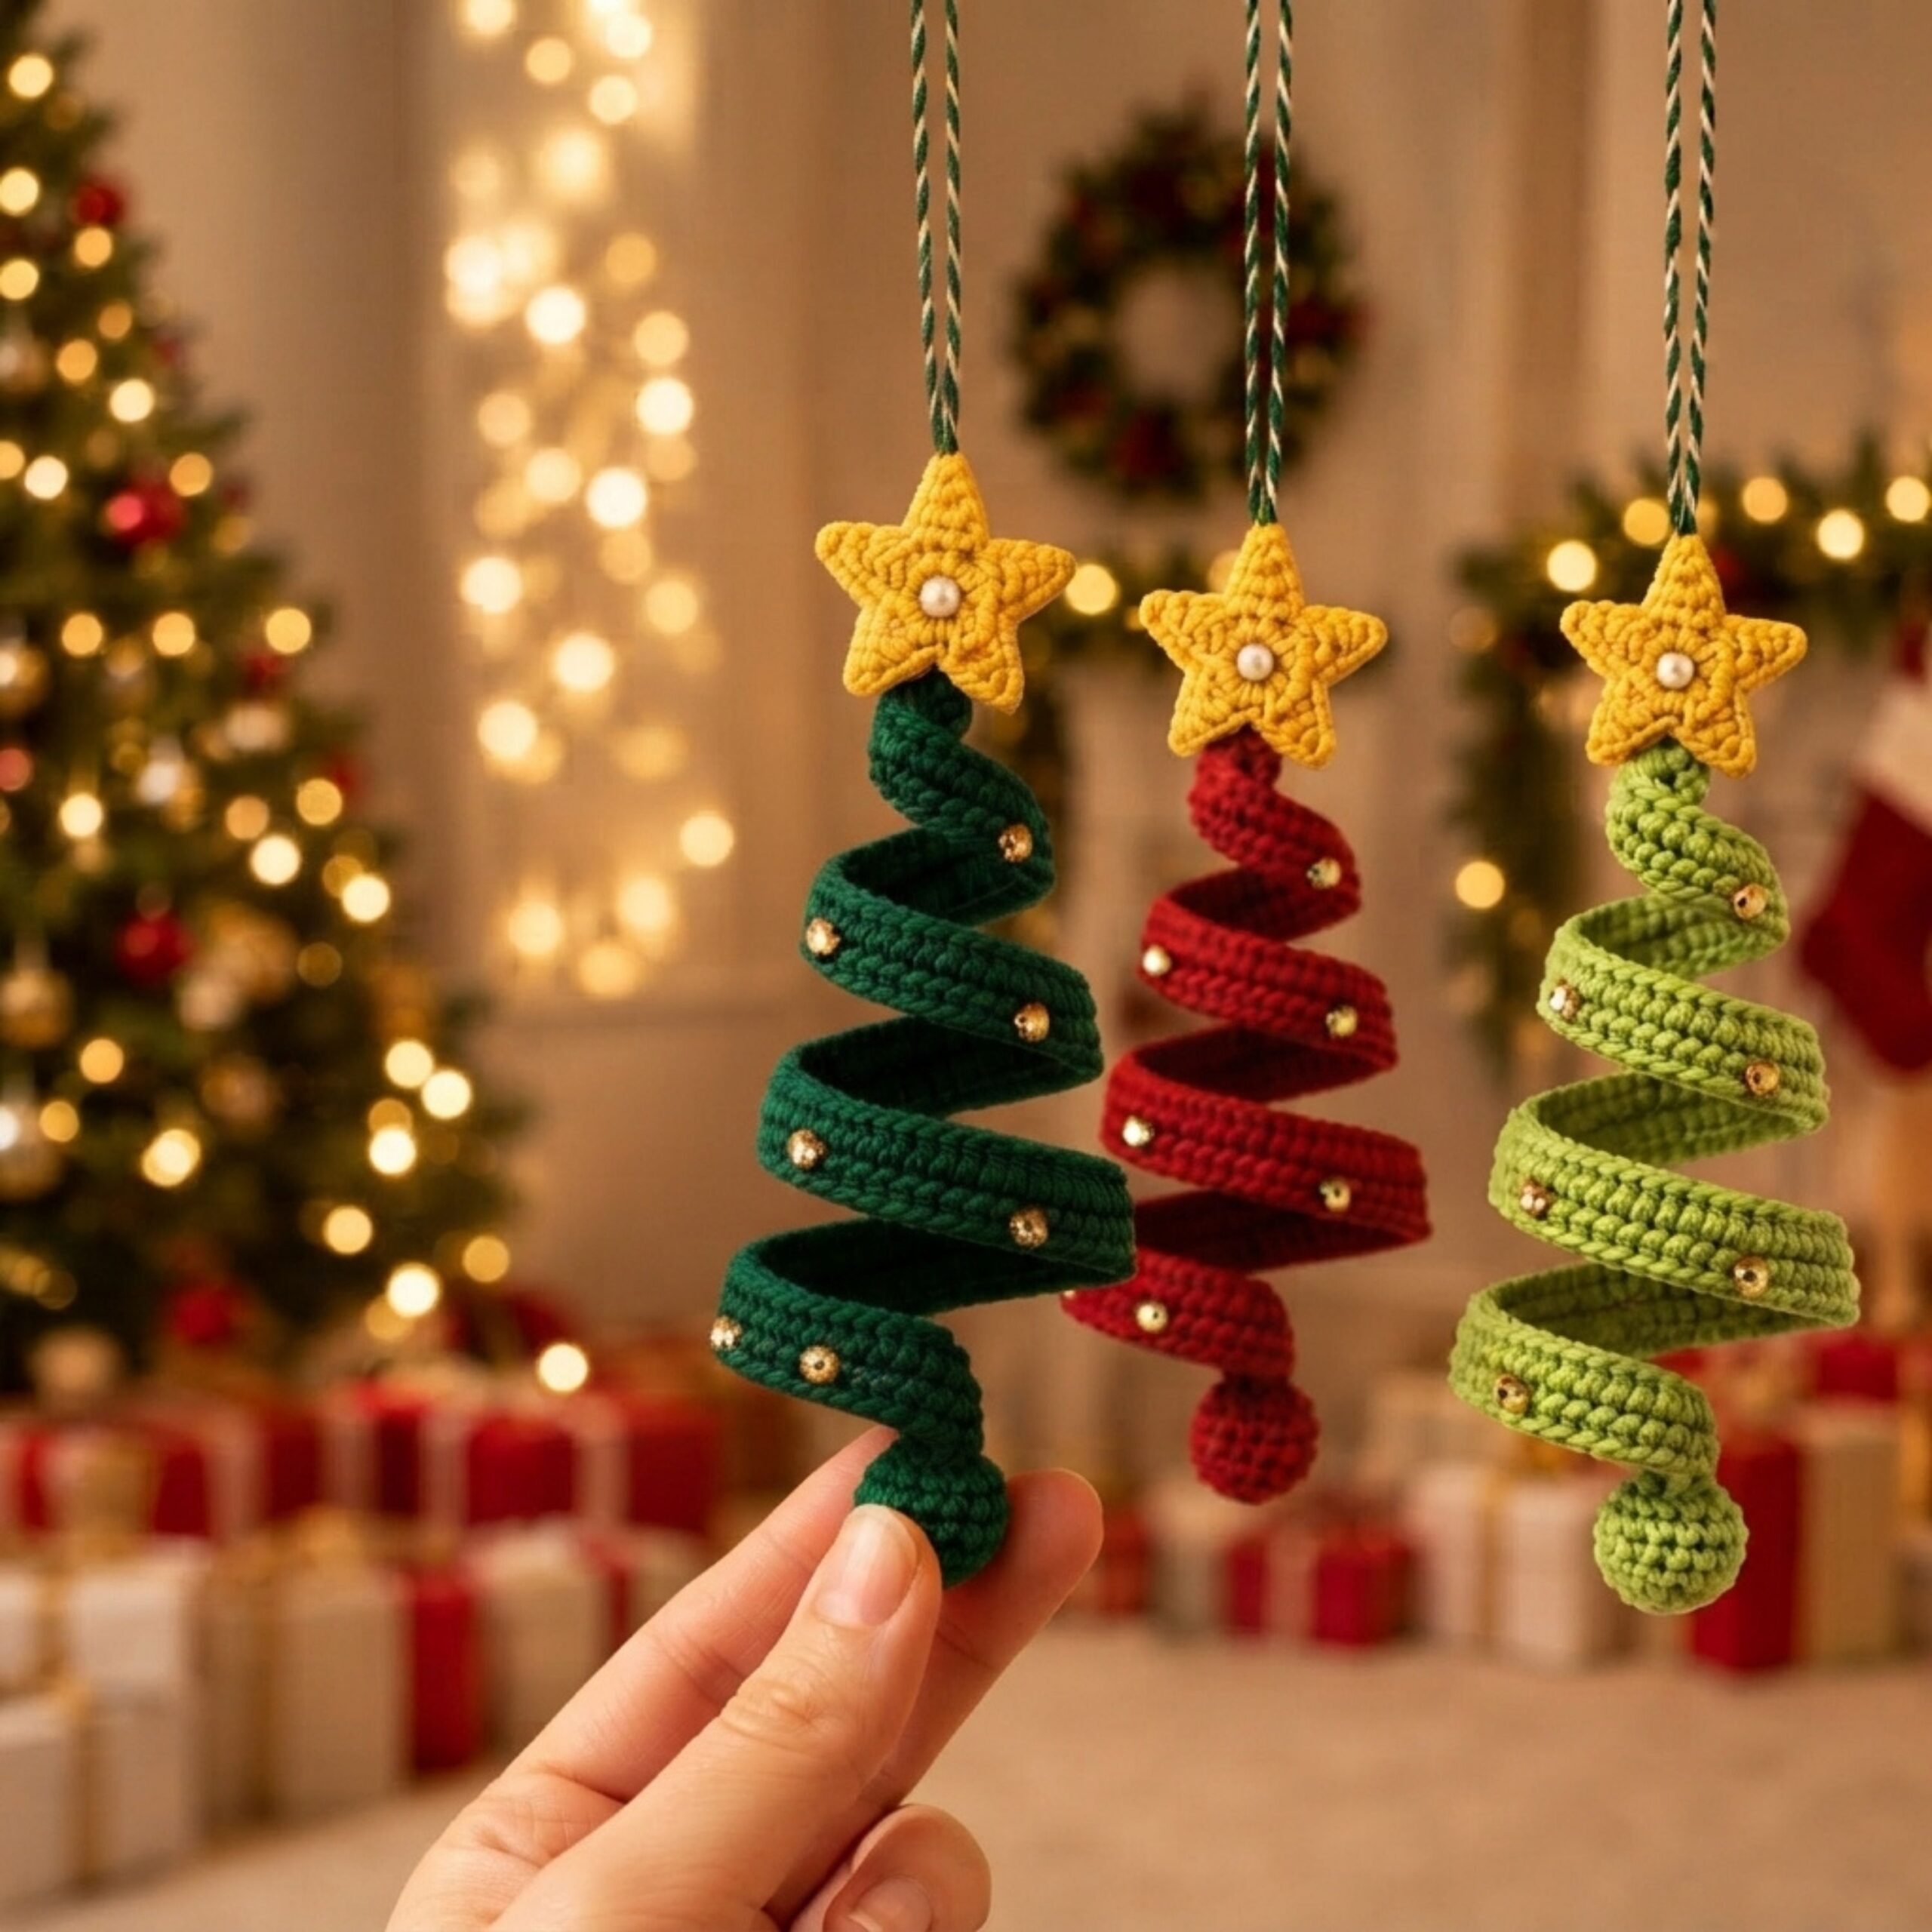
If you’ve been wanting to make a handmade ornament for your tree — something cheerful, quick, and truly beginner-friendly — this is it. This crochet spiral Christmas ornament is a slim crochet strip that you stiffen and wind into a firm, springy coil, then finish with a sunny star (or flower) on top and a little ball at the base. It looks just like a tiny modern Christmas tree, and it’s one of the easiest festive projects you can make.
Here’s the part I love: you only need two basic stitches — the chain and the single crochet. There’s no amigurumi shaping, no safety eyes, and no wire. The “magic” that turns a flat strip into a coiled spiral isn’t crochet at all; it’s a simple glue-and-water soak that dries firm overnight. If you can chain and single crochet, you can absolutely make this.
Below you’ll find the free foundation tutorial — the spiral strip and the stiffening technique that makes the whole thing work. If you’d rather have the complete printable, ad-free PDF ebook (with the star and flower toppers, the ball base, exact bead placement, troubleshooting, color variations, and gift-making tips), you can grab that below.
🧶 Prefer the printable, ad-free version? Get the Spiral Christmas Tree Ornament Pattern PDF — full step-by-step photos, star + flower toppers, the ball base, bead finishing, a printable summary card, troubleshooting, and variations. Instant download.
🛒 Shop the exact yarn and supplies I use → Amazon storefront → “Spiral Ornament Kit”
Quick Info
| Skill level | Easy Beginner — a perfect first festive project |
| Time to make | About 1–2 hours to crochet + overnight to dry |
| Hook size | 3.0 mm |
| Yarn | 3-ply / fingering-weight cotton (green + a little yellow) |
| Stitches used | Chain, single crochet (plus a couple of simple shaping stitches in the topper) |
| Finished size | Approx. 10–15 cm (4–6 in) tall |
| Best for | Christmas trees, garlands, wreaths, gift toppers, craft-fair inventory |
Why This Crochet Spiral Christmas Ornament Is Perfect for Beginners
Most “spiral ornament” patterns you’ll find are actually intermediate amigurumi — worked over a wire or chenille-stem core, with safety eyes and fiddly color changes. This one is different. It’s a genuinely beginner make: a simple crochet strip that gets its shape from a glue soak, not from complicated stitch work.
Here’s what you’ll learn while making it:
- Working an even single crochet strip — the foundation of dozens of flat crochet projects
- The stiffen-and-shape technique — soaking crochet so it holds any shape you like (stars, snowflakes, baskets, bows — all use this same trick)
- The magic ring — the starting point for the topper and the little ball
- Simple shaping in the round — a gentle first taste of increases and decreases
By the end, you’ll have a finished ornament you’re proud to hang and a technique you’ll reach for again and again. That’s what makes this a great early project — you’re not making a swatch, you’re making a keepsake.
New to reading crochet patterns? Read my How to Read Crochet Patterns and Abbreviations guide before you begin.
Materials You’ll Need
🛒 Everything in one place → Shop the Spiral Ornament Kit on my Amazon storefront — cotton yarn, the exact 3.0 mm hook, craft glue, beads, and finishing tools.
Yarn
You only need a few metres of cotton, so this is a wonderful scrap-yarn project. Use a 3-ply / fingering-weight cotton in green (for the spiral and ball) and a little golden yellow (for the topper).
- Why cotton? A smooth cotton holds the stiffening mixture beautifully and keeps a crisp, defined coil — much better than a fuzzy yarn.
Not sure which yarn to pick? Read my full guide: 15 Best Yarns for Crochet (Tested & Reviewed) — the same principles apply here.
Hook
A 3.0 mm crochet hook. This small gauge is what gives the spiral its neat, delicate look. If your stitches feel loose and holey, drop to 2.75 mm; if they feel stiff, go up to 3.25 mm.
For stiffening and shaping
- White PVA / craft glue — the ordinary school-glue kind; it dries clear and firm
- A small bowl, and a cone form — a stiff acetate sheet (or a report cover) rolled into a cone works perfectly
- 2–4 small clips or clothespins to hold the strip while it dries
For the finishing touches
- A pinch of toy stuffing for the little ball
- A scatter of gold flat-back gems or beads plus one center bead for the topper
- Stitch marker, tapestry needle, scissors
Gauge: Gauge isn’t fussy here — there’s no garment to fit. Aim for a firm, tidy fabric with no big gaps (the stiffening likes a dense strip), and you’re good to go.
Abbreviations (US Terms)
- ch — chain
- sc — single crochet
- st(s) — stitch(es)
- MR — magic ring
- rep — repeat
This pattern uses US crochet terms. If you’re used to UK terms: US single crochet (sc) = UK double crochet (dc).
The Free Tutorial: Make the Spiral
The whole ornament starts with one long, skinny strip — and the “wow” moment is watching it hold a coiled shape. Let’s make that part together right now.
Part 1: Crochet the Spiral Strip
This couldn’t be simpler — it’s a chain with two rows of single crochet on top. Take the first row slowly; it becomes automatic almost immediately.
- With your green yarn and 3.0 mm hook, ch 60.
- Row 1: Turn. Sc in the 2nd chain from your hook, then sc in each chain across to the end. (60 sc)
- Row 2: Turn. Sc in each stitch across. (60 sc)
- Fasten off and weave in both ends.
That’s your spiral — a neat green ribbon, still flat for the moment.
Beginner tip: Try not to chain too tightly. Loose, even chains are much easier to work back into, and the strip needs its full length to make a nice full coil.
Part 2: The Magic Stiffening Technique
This is the step that turns a floppy strip into a firm, springy spiral — and there’s no crochet involved, just a simple soak and a little patience.
- Mix the stiffener. In a small bowl, stir together 1 spoonful of white glue and 3 spoonfuls of water until smooth and milky.
- Soak the strip until it’s wet all the way through, then lift it out and gently squeeze along its length to remove the excess. You want it damp, not dripping.
- Make your cone. Roll a stiff plastic sheet into a cone and tape it. This is just a mold — the ornament won’t stick to smooth plastic.
- Wrap the strip around the cone in a spiral, starting at the wide base and winding up toward the point. Space the coils evenly so you can see the pretty gaps between them.
- Clip the top and bottom to hold it in place, and leave it to dry overnight until it’s completely firm.
- Once fully dry, slide the spiral off the cone. It holds its coiled shape all on its own — like a little spring.
Beginner tip: Overnight really does mean overnight — give it a full 8–12 hours. If you unwind it while it’s still even slightly damp, it can relax and lose its spring.
🎁 Get the Full Pattern — Toppers, Ball, Beads & Assembly
You’ve made the spiral — the part that makes people say “how did you do that?” The rest is beginner-simple, and it’s all waiting for you in the printable PDF.
The full Spiral Christmas Tree Ornament Pattern PDF includes:
- ✅ Two topper options — a 5-point star and a 5-petal flower, both worked from a magic ring
- ✅ The little ball base — a mini amigurumi ball, round by round with stitch counts
- ✅ Exactly where and how to add the beads for that twinkly finished look
- ✅ A printable one-page summary card for quick reference
- ✅ Troubleshooting for every little snag
- ✅ Color and size variations + a garland idea
- ✅ Gift-making and packaging tips
Grab the PDF for instant download → Spiral Christmas Tree Ornament Pattern PDF
A Few Quick Tips While You’re Here
My spiral won’t hold its shape. It probably came off the cone before it was fully dry, or the mixture was too watery. Re-soak, re-wind, and give it a full overnight dry. A slightly thicker glue mix sets firmer.
The strip curls or twists as I crochet Row 1. A long chain naturally wants to twist — just straighten it out before you work back along it, and make sure every stitch goes into the correct chain.
The coils bunch up unevenly on the cone. Unwind and start again from the base, spacing the wraps as you go. It’s much easier to fix while the strip is still damp than after it dries.
Make It Your Own
Once you’ve made one, it’s hard to stop — and this little ornament loves a remix:
- Play with color. Classic green, cheery red, frosty white, or soft sage all look gorgeous. Match your tree or the person you’re gifting.
- Change the topper. A star reads like a classic Christmas tree; a little flower feels fresh and modern. (Both are in the PDF.)
- Make a set. Odd numbers look best on the tree, so make three in coordinating colors — quick and low-cost from cotton scraps.
- Make a garland. Skip the ball and thread several finished spirals onto a length of twine.
Care Instructions
Because it’s stiffened with a glue-and-water mixture, this ornament is a decoration rather than a washable item — treat it a little like a paper craft. Keep it dry, dust it gently with a soft dry brush, and store it flat or hanging with a little tissue around the topper so it keeps its shape year to year.
You Did It!
You just turned a single strip of yarn into a firm little spiral — and learned the stiffen-and-shape trick that opens the door to stars, snowflakes, bows, and baskets. That’s a real crochet skill unlocked, not just a project finished.
I’d love to see your ornament on the tree. Tag me on Instagram @CrochetModernDesign or use #CrochetModernDesign — I share community makes in my Stories every week.
Loved This One? Your Next Favorite Is Waiting →
- 🎄 Spiral Christmas Tree Ornament Pattern PDF — the complete printable version of this tutorial
- ❄️ Winter Crochet Bundle — 5 PDF Patterns (Save 60%) — 5 beginner-friendly winter favorites
- 💧 Free Crochet Water Bottle Holder Pattern — another quick, satisfying weekend project
Happy crocheting,
— Elowen 🧡