


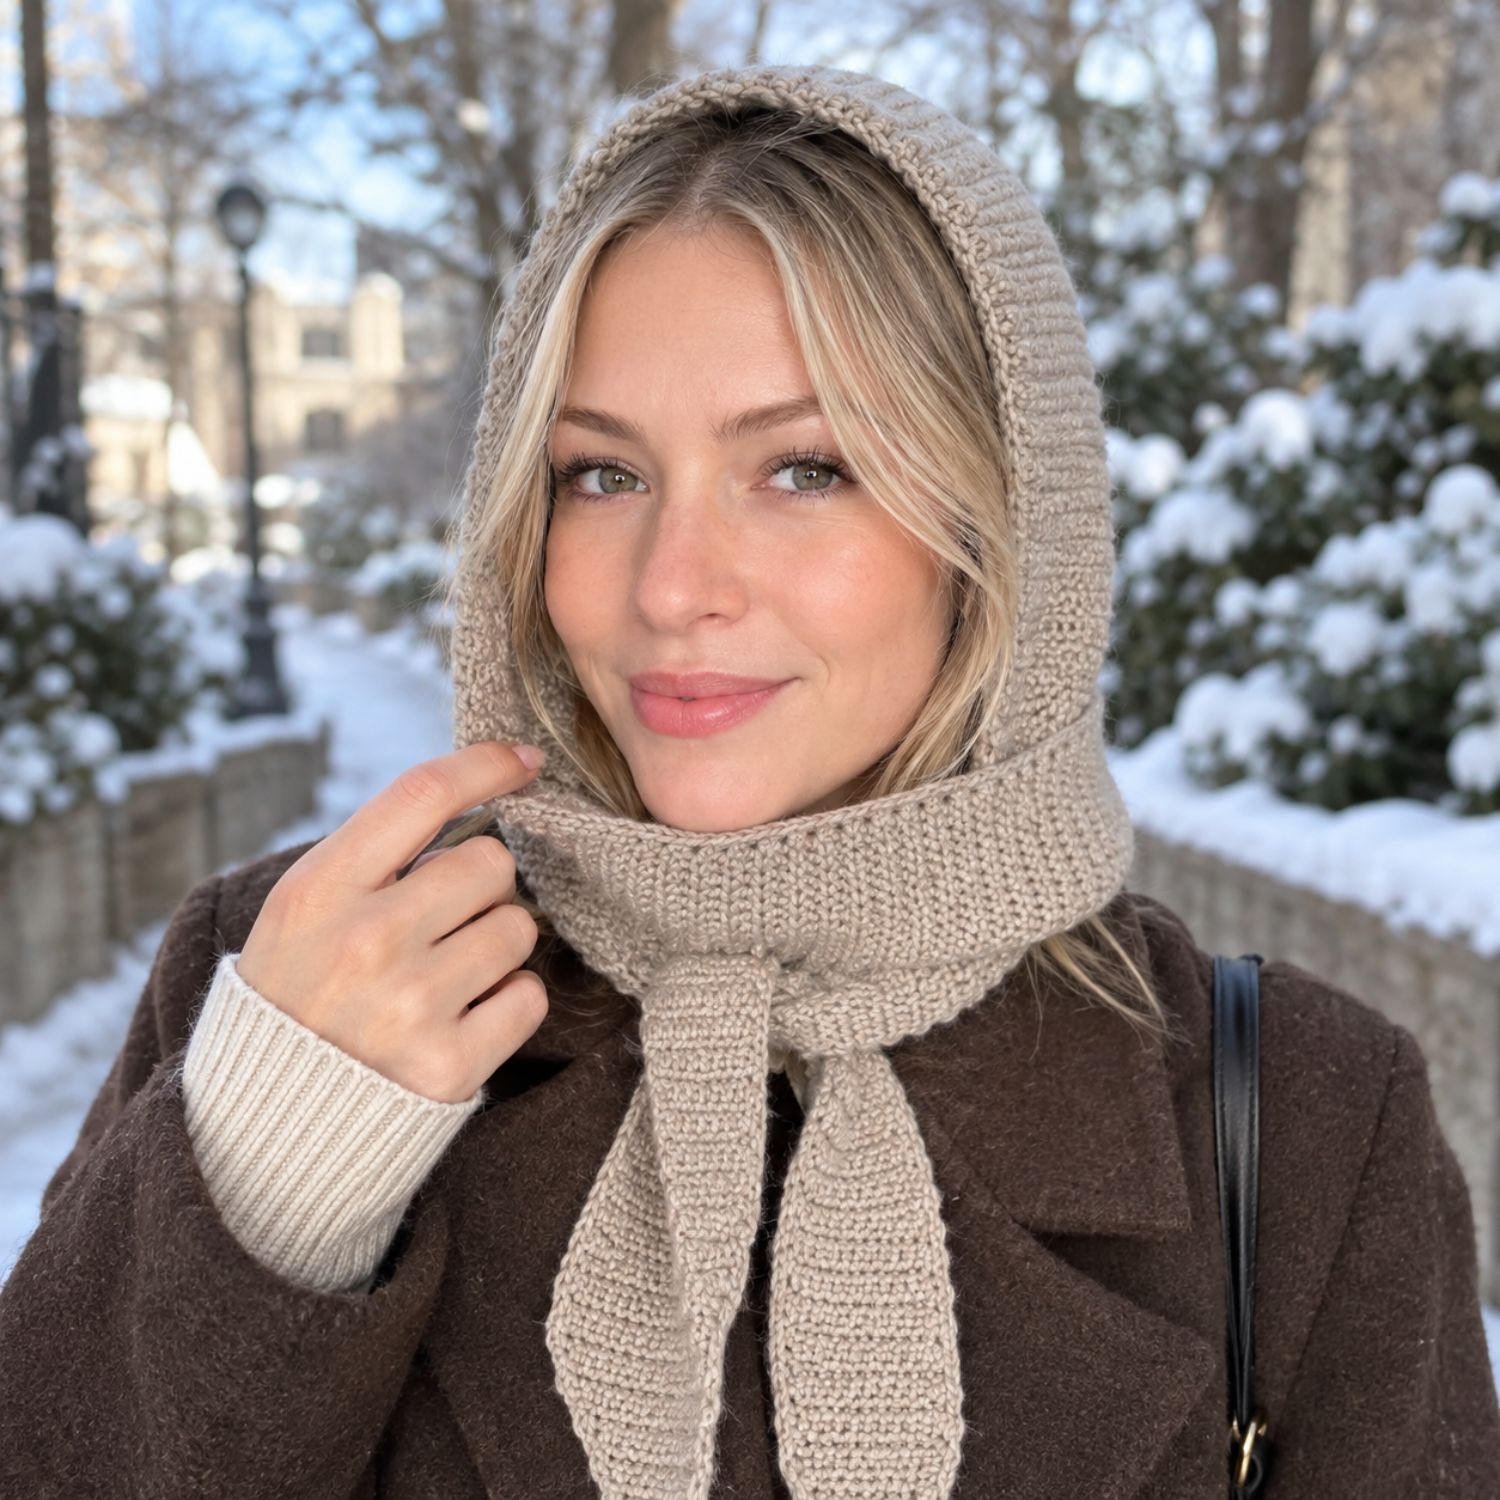
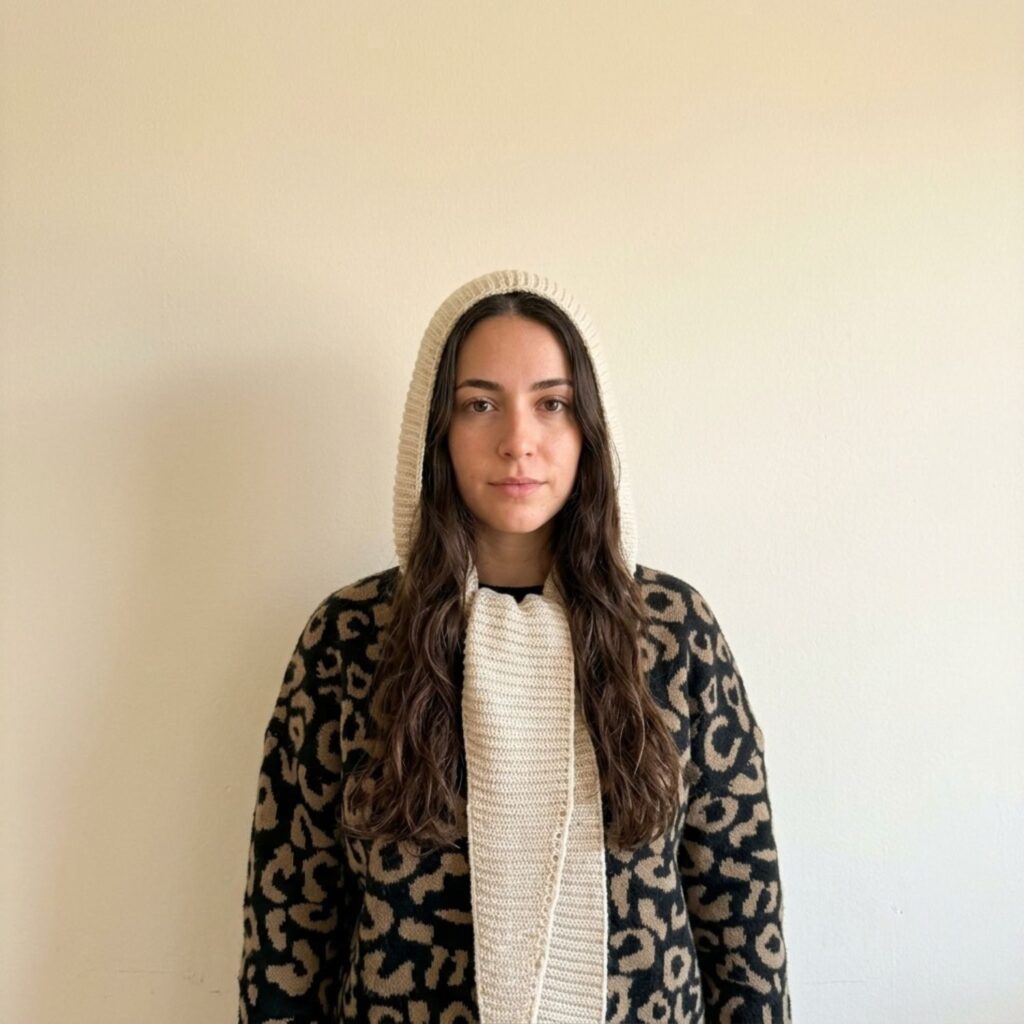
If you have ever wanted to crochet something that looks knitted — properly knitted, with soft vertical ribs and not a visible crochet stitch in sight — this is the project. Today I want to show you how to crochet a hooded scarf using one single stitch from beginning to end, and I promise that by the time you have twenty rows behind you, you will not quite believe you made it with a hook.
No cables. No stitch pattern to memorise. No counting shells. Just the humble slip stitch, worked in a way most of us were never taught.
Let me show you.
You can get the full pattern from here
Why this crochet hooded scarf looks knitted
The secret is slip stitch worked through the back loop only.
Slip stitch is the shortest stitch in crochet — it produces almost no height at all. That is usually treated as a weakness, which is why most of us only ever use it to join rounds. But turn it into a fabric, work every row through the back loop, and something lovely happens: the front loops you left behind line up into neat vertical columns, exactly like the ribbing on a knitted scarf.
Crocheters sometimes call this the knit stitch, or Bosnian crochet. Whatever you call it, it is the closest crochet gets to knitting, and it is a genuinely beautiful fabric — dense, warm, with real drape and no holes for the wind to get through.
The best part? It is one stitch. If you can chain and slip stitch, you already have every skill this scarf needs.
What you’ll need
- Soft DK or light worsted acrylic yarn, around 200–250 g. Smooth and round is what you want here — fluffy, velvet and boucle yarns hide the ribbed texture completely, which rather defeats the purpose. I used Bernat Softee Baby, and Paintbox Simply DK is a lovely alternative.
- A 5 mm (H-8) crochet hook. An ergonomic handle is worth it — this is a long, repetitive project and your hand will notice.
- A smaller 3.5 or 4 mm hook for the seam and edging.
- Locking stitch markers — several. These genuinely make this project.
- A yarn needle and scissors.
One thing I would add that nobody thinks to buy: a row counter. This scarf runs to several hundred short rows, and a little clicker saves an astonishing amount of recounting.
The stitch: slip stitch in the back loop only
Here is the whole technique. Read it once, then go and try it — it takes about thirty seconds to learn.
Look at the top of the row you just finished. Every stitch shows you two strands sitting side by side, like a tiny letter V. The strand nearest you is the front loop. The one behind it is the back loop.
You are going to insert your hook under that back strand only — never both — yarn over, and pull the loop straight through both the stitch and the loop on your hook in one movement. That is it. One slip stitch, worked in the back loop.
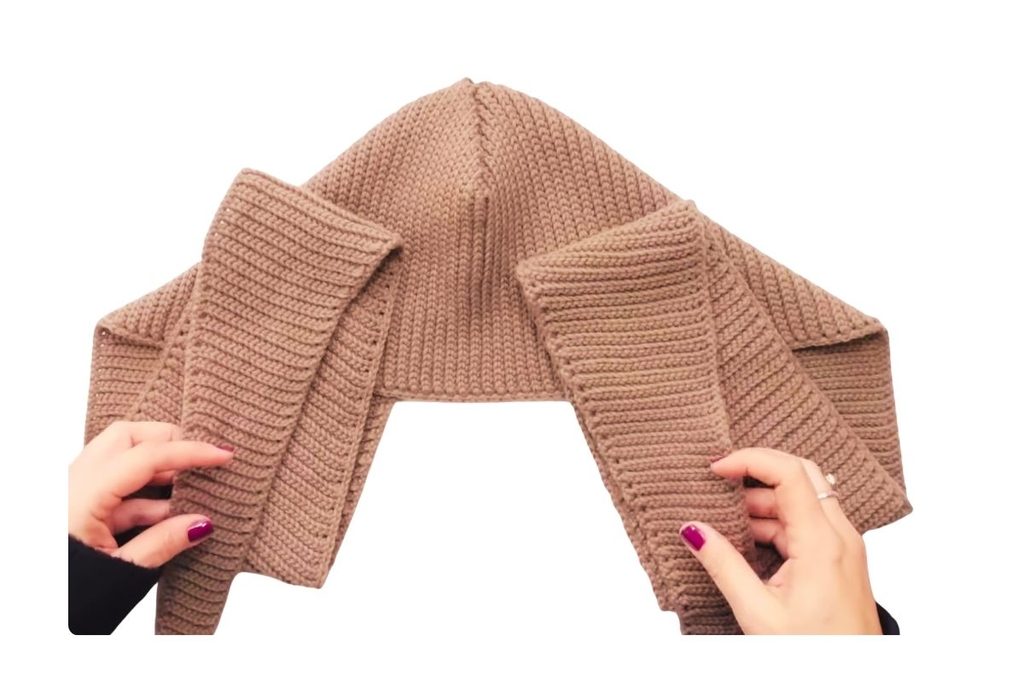
Work a small practice swatch before you commit to a whole scarf:
- Chain 21.
- Slip stitch into the 2nd chain from the hook, and into every chain across. You should have 20 stitches.
- Chain 1, turn, and slip stitch into the back loop of every stitch across.
- Repeat step 3 about twenty times.
Around row fifteen you will suddenly see it — the ribs appear, and it stops looking like crochet. That moment is why I love this stitch.
Three things that will save you
Work loosely. This is the big one. Slip stitches are tight by nature, and if you pull each one snug the next row becomes genuinely hard to hook into and your hands will ache. Keep the loop on your hook a touch larger than feels natural. If the fabric comes out stiff as cardboard, go up half a hook size — you lose nothing in appearance.
Watch the last stitch of every row. It curls over and hides itself, and if you miss it your count quietly drops and your straight edge starts to lean. Stretch the row flat and look right to the end before you turn. Every time.
Count braids, not rows. As the fabric grows you will see little braids forming along the edge — one row out, one row back. One braid always equals two rows. Counting braids is far faster and far more reliable than counting rows, and it is how I keep my place.
How the scarf is built
The whole thing is one long strip, worked flat, back and forth. You start at a single stitch at one tip, grow gradually into the full width of the scarf, work through a shaped curve at the centre, then mirror everything back down to a single stitch at the other tip. Two soft tapered points, a gentle curve in the middle.
That curve at the centre is the clever part. It narrows the scarf right where it sits at your neck, so the finished piece curves around your shoulders instead of bunching under your chin.
The hood is not crocheted separately. You fold the strip at its centre and join a short seam — about twenty braids — and the hood simply appears. It takes twenty minutes and it is the most satisfying part of the whole make.
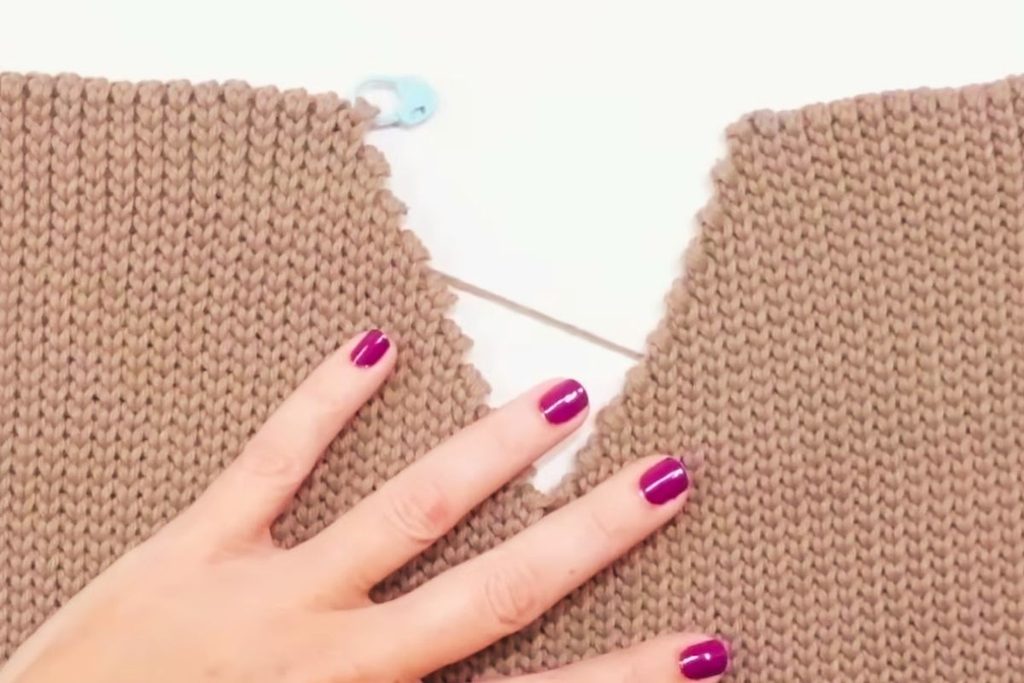
Your first rows
Start like this:
Chain 2.
Row 1: Slip stitch into the 2nd chain from the hook. You have 1 stitch. Yes, just the one — everything grows from here.
Rows 2 and 3: Chain 1, turn, and slip stitch into the back loop of that single stitch.
To increase, you chain 2 instead of 1, turn, slip stitch into the 2nd chain from the hook — that chain becomes your new stitch — and then slip stitch across as usual. One stitch added.
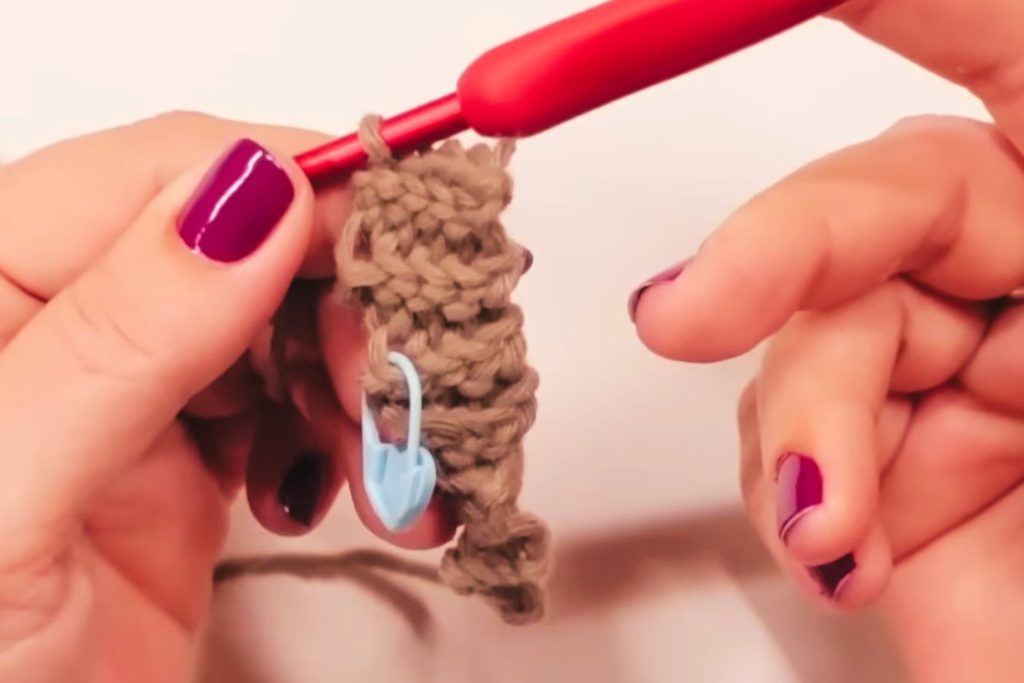
The moment you make that first increase, slide a stitch marker onto that edge. Every increase and every decrease in the entire scarf happens on that one side, and the marker is what keeps you honest. It is the single most important habit in this project.
From there it is a rhythm: rows of slip stitch, an increase at regular intervals on the marked edge, and the scarf widens beneath your hands.
Where the full pattern takes over
The rhythm is simple — the bookkeeping is what takes the work out of it.
The full PDF pattern gives you the exact increase schedule, the stitch count at the end of every single row, checkpoint tables so you can verify your count without recounting from the beginning, the shaping for the centre curve, the hood assembly step by step, and the finishing round that stops the edges curling.
It also includes the parts I could not fit here: how to resize it longer, shorter, wider or for a child, a full troubleshooting section, and a Variations chapter with pompoms, pockets, stripes and a lined hood.
Get the Sophie Hood Scarf pattern →
25-page illustrated PDF · Instant download · Beginner-friendly
Make it your own
A few ideas to start you off:
- Pompoms on the two points. Playful, and the weight makes the tails hang beautifully.
- Stripes — change colour at the start of a braid so the join lands cleanly.
- A gradient cake does all the work for you and looks extraordinary on this stitch.
- A contrast edging round outlines the whole shape in five extra minutes.
- Skip the hood seam entirely and you have a long pointed wrap scarf.
And if you are making this as a gift — it is one of the loveliest handmade gifts I know. Soft, warm, genuinely impressive, and perfect under the Christmas tree.
Frequently asked questions
Is this suitable for a beginner?
Yes. There is one stitch in the entire scarf. If you can chain and slip stitch, you have everything you need — the pattern is written for someone making their first proper garment.
How much yarn do I need?
Around 200–250 g of DK or light worsted yarn. Slip stitch fabric is denser than it looks, so buy a little more than you think and keep to one dye lot.
Does it really look knitted?
It really does. The ribs do not appear until you have twenty or thirty rows stacked up, so do not judge it at row five — but once it clicks, most people assume it came off needles.
How long does it take?
It is a long project — an evening-after-evening make rather than a weekend one. The rows are short and quick, and the rhythm is restful once you find it.
Can I sell what I make?
Yes. You are very welcome to sell finished items made from the pattern. A credit to Crochet Modern Design is always appreciated. Please don’t resell or share the pattern file itself.
New to crochet? Start here with my beginner guide. And if you want more cosy winter makes, the Winter Crochet Bundle (5 PDF Patterns) has you covered.
Happy hooking,
Elowen 🧡